Bias images
These images correspond to the base level of the CCD, they are stimated by some previous images with zero exposition time.
Operation files
The aim of the bias images is to stimate this base level, for this, the bias images must be combined in only one image, called master bias.
First write a list file with the path of each image (it could be any type of text file, for example, .txt or .ls, in this example it was named bias.ls). Below is an example of the file content format.
bias/bias_1.fits
bias/bias_2.fits
bias/bias_3.fits
Bias estimation
To estimate the master bias put AstroCanvas in bias mode and write the name of the list file in the bias images entry. You can also select an area of the image writing the limits in the Crop image entries.
There is also an option to select the combination of all the images (combining images entry), this can be by the median or the average (pixel by pixel) of the images.
To obtain the master bias, press the make master bias button and, after the processing, the master bias appears in the canvas.
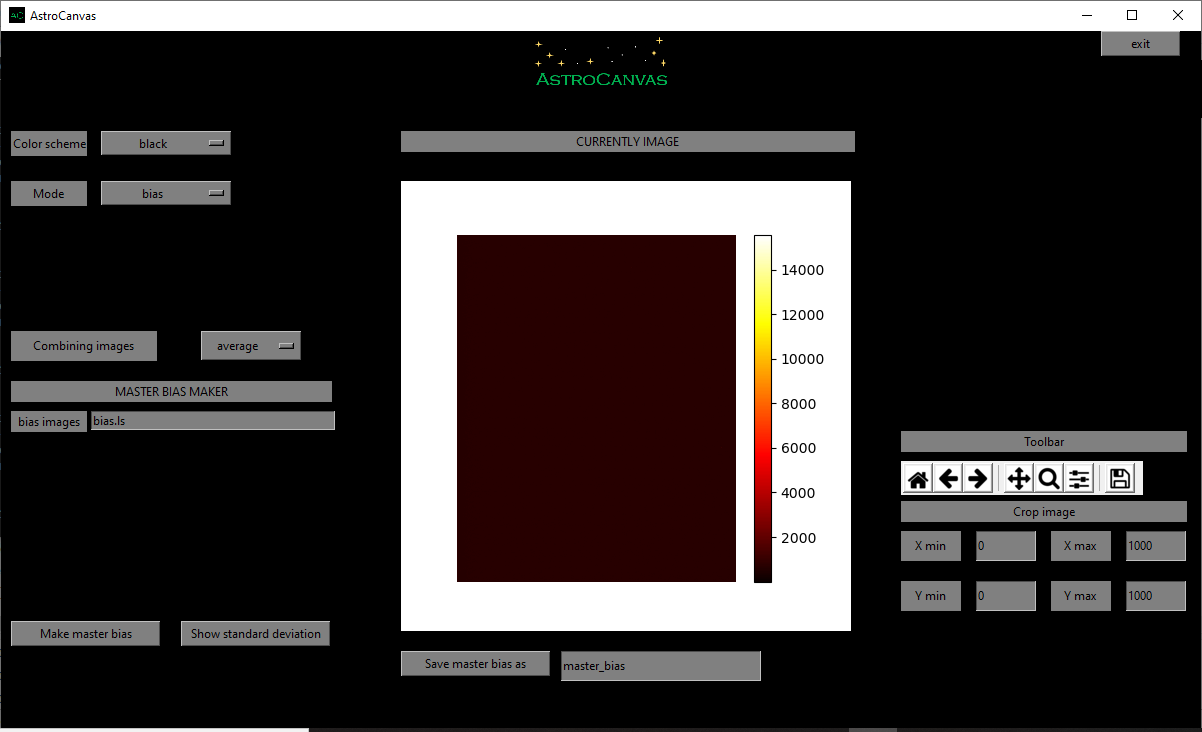
fig. 1 screenshot of Astrocanvas in bias mode plotting a master bias image.
In addition, a image with the standard deviation could be shown in the canvas with the show standard deviation button.
The Matplotlib toolbar is available in the right of the window with its basic functions.
When you make a bias image, the terminal shows some information, the average, the standard deviation, the maximun value and the minimun value of the master bias pixels and also its size, an example is shown below.
Bias image
------------
average= ( 683.6896911999997 )
standard deviation= ( 327.6032262004767 )
max= ( 15564.7 )
min= ( 2.0 )
size= 1250 X 1250
Finally, you can save the master bias writing a name and clicking on the Save master bias as button.